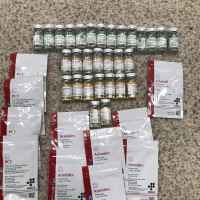
When considering the first steroid cycle, the correct injection technique is usually the last thing people consider. They will have thought of their goal, researched various drugs, stacking and cycles, but it's not until they have a range of vials, needles and syringes sitting in front of them that they actually consider how they are going to get the substances out of the bottles and into their body. For many people, this is the point where self-injecting becomes of concern and, in a lot of cases, individuals become so worried that they forgo the plan entirely or opt for oral only cycles: and in either case they are severely short-changed.
HOW NOT TO INJECT STEROIDS
Go to any message board, and at some point you?ll find people asking how to inject steroids. Often some ways being considered are nothing short of ridiculous yet one in particular stands out - how to inject steriods intravenously. Here I have to be very, very, clear: you do not inject anabolic steroids intravenously as it is dangerous. Anabolic steroids are meant to be injected direct into the muscle tissue, however some steroids can also be injected subcutaneously.which means into the upper layer of fat just under the skin.
HOW TO INJECT STEROIDS - PREPARATIONS
When injecting steroids the first thing you need to know is how to prepare for the injection and there is more to it than you might initially think.There are eight specific steps you need to follow when injecting and while that may sound complicated the whole process shouldn?t take more than a minute. However failure to follow these eight remarkably simple steps can result in complications such as infections or simply very uncomfortable injections or an unnecessarily sore injection site.
Step 1: Choosing a Needle
There are numerous needle sizes available and you need the right one to do the job properly. Large needles are not necessary but you don?t want one too small as the oil will barely push through. Most often a 23g-25g needle will serve your needs and a 1? length will suffice although 1.5? is also available. Some people find ?? needles to be sufficient, but they are only suitable if injecting into a very low body-fat area. Regardless of the needle size you choose, you will always attach a new sterile needle each time you inject.
Step 2: Drawing Air
Although the drawing and emptying of air into the syringe is not essential it does make the process easier. Before you draw any fluid into the syringe, the first step is to draw up, at a minimum, an amount of air that is equal to or exceeds the amount of fluid you intend to draw. Drawing a little more air than needed is absolutely fine and can make the process even easier.
Step 3: Empty the Air
You must then expel the air you have drawn into the syringe by placing the needle into the oil (the steroids you?re using) and pushing all the air in. Then leave the syringe in the fluid and move on to the next step.
Step 4: Draw the Oil
Now all you have to do is simply pull the plunger of the syringe back until the desired amount of fluid is obtained. Drawing a small amount more than you need is preferable as you might lose some when you move on to Step 5. In some cases many people prefer to use a ?Draw Needle? for this purpose, which means using a larger needle to draw up the fluid and a smaller one to inject. In this instance, you will use a 20g-21g needle to draw your oil into the syringe as it is much easier and faster. If you choose this method, you will follow steps 2 and 3 with your draw needle. After Step 4 you then replace the draw needle with the injection needle you chose in step 1.
Step 5: Remove Air Bubbles
Now the oil is in the syringe, you push the plunger down gently while tapping your finger against the side of the syringe to remove all air bubbles. This will cause a little bit of oil to shoot out of the needle, but that?s why you drew up a little extra. At this point make sure that there is the correct amount of fluid in the syringe.
Step 6: Disinfecting
Determine which muscle you?re going to inject and the specific location. Use an alcohol swab or alcohol on a cotton ball to disinfect the area. Although alcohol swabs are preferable, the cotton ball method is adequate.
Step 7: Plunge the Needle & Aspirate
Once the area is disinfected, plunge the needle in the muscle but do not inject yet. When the needle is firmly in place, pull the syringe back slightly; this is what is known as Aspirating. When you aspirate, if blood fills the syringe it means you have hit a vein or a blood vessel and you should remove the needle and pick a new location Injecting into a vein or blood vessel means you could fall prey to what is known as, ?Tren Cough.? Trenbolone is the most notorious anabolic steroid for causing this, but it can happen even withTestosterone. Tren Cough means that some of the steroid gets into the lungs, and causes a violent cough that can be quite frightening and painful. Your mouth will taste like metal, and some say their teeth even hurt. Don?t let the possibility of Tren Cough scare you; if you aspirate and follow our recommendations you?ll be fine.
Step 8: If you have followed steps 1-7 and no blood entered the syringe during step 7, you are ready to inject your steroid(s). Simply push the plunger down until all the syringe is empty.
POST INJECTION PROTOCOL
Although you now know how to inject steroids you also need to know what to do immediately following the injection and which is also an essential part of the procedure which many, unfortunately ignore. This easy three step process takes only a moment and will make the whole process smoother.
Step 1: Although all the oil has been injected, do not remove the needle. Leave it in place for approximately 20-30 seconds to ensure all the oil has settled deep into the muscle. If you skip this step, there?s a decent chance some of the oil may leak out, or worse settle under the skin which can lead to a sterile abscess and is extremely painful.
Step 2: Now you are ready to remove the needle. As you do place a fresh, clean cotton ball directly over the injected area. Applying a little pressure, hold the cotton ball in place for approximately 20-30 seconds. There?s a decent chance a little blood will be on the cotton ball (which is why you?re doing this), but this is no reason for concern.
Step 3: After you remove the cotton ball, firmly massage the area for a few seconds to ensure all the oil is dispersed deep into the muscle. Now you are finished.


